Select from the tabs below to view the indicated information. Read and follow all of the instructions to ensure that your integration goes smoothly.
Introduction
Introduction
These instructions have been provided to assist with integrating Freestar AMP Tags & Components into your HTML AMP pages.
Freestar test page for AdUnit positioning - http://demo.freestar.com/amp
Example of the tags and components we provide - https://l.t13.io/5hgj
The documentation provided is an example of what your code may look like. Please use the tags provided by your Onboarding Specialist or Customer Service Manager to ensure that your site-specific tags are used.
What you are going to need
- An AMP page that you want to deliver Ads to
- Freestar AMP Tags & Components (Public URL) - Provided by your Onboarding specialist
What the tags and components do
- AMP components - These allow the various components and tags provided to deliver onto your AMP page
- Consent blocking meta-tag - this will stop personalised ads from showing if consent has not been captured and sent upstream
- CMP & Geo override - this component captures user consent to allow targeted ads to deliver - It also ensures the CMP is only delivered in GEO’s that require it
- Privacy settings - allows a user to alter their privacy settings at a later time
- Privacy CSS - determines which re-prompt link should be shown
- Cookie Sync - Allows SSPs to set user syncing cookies for targeted advertising
- Cookie Sync CSS - will prevent the user agent styles from adding whitespace to the User Sync iframe
- AdTags - 1-4 - these deliver MPUs 300x250 ads
- AdTag - 5 - this deliver a double MPU - 300X600
- AdTag - Sticky - a permanently displaying unit with refresh enabled to maximise yield
- AdTag - Flying Carpet - this delivers an scrolling double MPU
Additional considerations:
- If you are using our Sourcepoint CMP solution - ensure you have updated your DNS record to the final endpoint.
- Copy and paste the tags and components exactly as they are
- The AMP components, consent blocking meta tag, CMP & Geoveride and the Cookie Sync need to be present on every AMP page
- Placement of AdTags should be planned out to ensure optimal yield and user experience
- Reach out to your dedicated OnBoarding specialist for any guidance required
AdTags
AdTags
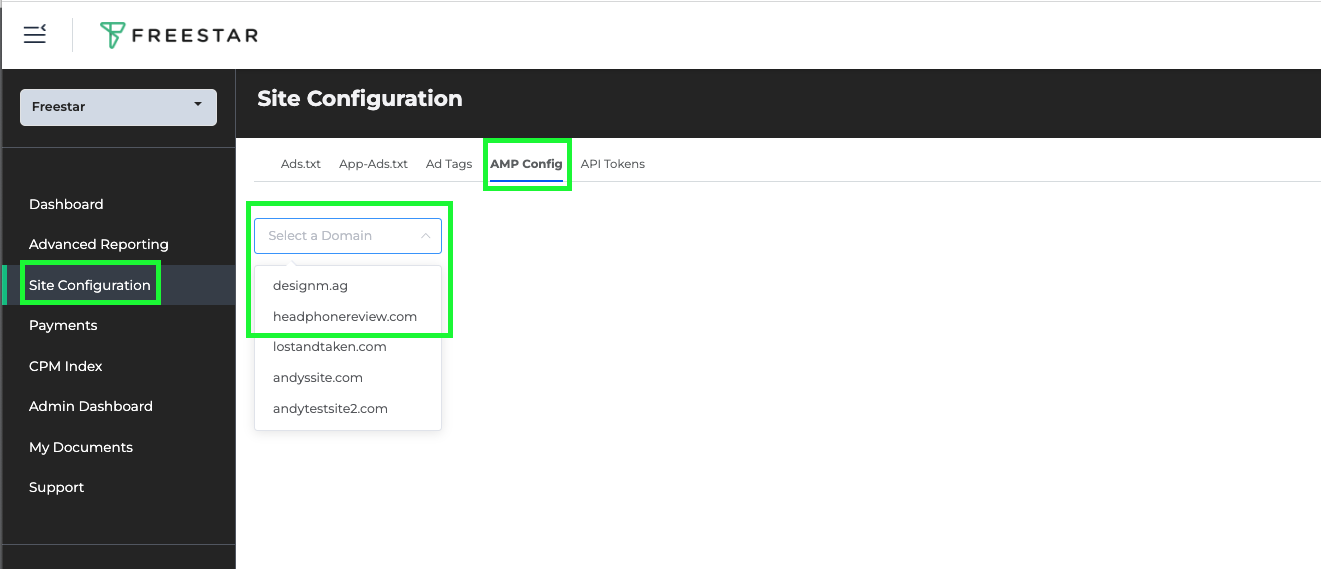
How to find your ad tags
- Login to the Freestar Dashboard.
- Select the 3 lines icon in the top left to open the left menu.

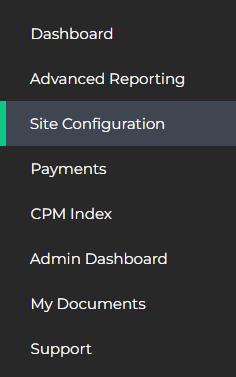
- Select Site Configuration in the left menu.
- Select the AMP Config Tab at the top of the page.
- Select the site in which you are looking for AMP tags. This will then display the ad code needed for AMP.


Advise:
- If you are unsure where these should be placed - please reach out to your OnBoarding specialist for guidance.
- A good rule of thumb is every viewport and a half distance apart.
Steps:
- Copy one of the Tags provided
- Locate the position in the <body> of the HTML you want the Ad to appear
- Paste in the Tag

AMP Components
AMP Components
Advise:
- Avoid duplicating any script tags as these will cause validation errors
- <script> tags should be grouped together in the <head> of the page
Steps:
- Copy the AMP components provided
- Go to the opening <head> tag on your page and locate any pre-existing <script> tags
- Paste them in

Meta Tag
Meta Tag
Advise:
- <meta> tags should ideally be grouped together in the <head> of the page
- If using an external CMP provider - please reach out to them for guidance on if the Consent blocking meta tag ios required
Steps:
- Copy the consent blocking meta tag provided
- Go to the opening <head> tag on your page and locate any pre-existing <meta> tags
- Paste in the consent blocking meta tag

CMP
CMP
Advise:
- The CMP & GeoOverride should ideally live under the opening <body> tag
Steps:
- Copy the CMP & GeoOverride components provided
- Go to the opening <body> tag on your page
- Directly under the opening <body> tag - paste the CMP & GeoOverride

User Sync
User Sync
Advise:
- UserSync component MUST be placed under the opening <body> tag otherwise it will not work.
- Also referred to as Cookie Sync
Steps:
- Copy the UserSync component provided
- Go to the opening <body> tag on your page (where the CMP & GeoOverride has just been installed)
- Directly under the CMP & GeoOverride tag - paste in the User Sync

Privacy Settings
Privacy Settings
Steps:
- Copy the Privacy settings component provide
- Locate the opening <footer> tag on your page
- Paste in the Privacy Settings

CSS
CSS
Advise:
- There are two sets of CSS rules required, one set for the Privacy Settings and one set for the User Sync
Steps:
- Copy the CSS rules provided (this will take two runs)
- Locate the CSS rules in the <head> of your AMP page
- Paste the CSS rules

Ads.txt
Ads.txt
These instructions have been provided to assist with uploading an ads.txt file - there are lots of variations - if you have a different setup or any question please reach out to your OnBoarding specialist.
What is ads.txt:
Ads.txt = Authorized Digital Seller - It is a list of all partners authorized to sell the site inventory. The ads.txt list is saved as a text file and uploaded to the root domain of your site.
What you are going to need:
Ads.txt file provided
Steps to add to ads.txt to a .txt file:
- Create an ads.txt file on your site
- Add the ads.txt file provided
- Place the file in your HTML root domain
- Push latest changes to the live site
Steps to add to ads.txt to Wordpress
- Install the ads.txt Manager plugin on your Wordpress site
- Left menu bar - hover over settings > select Ads.txt
- Paste the ads.txt file provided
- Save settings
Dynamic Adas.txt
Why we use Dynamic Ads.txt?
We utilize a dynamic ads.txt product so that you will always have the most up-to-date version of ads.txt. To add this you will need to create a redirect to a file on our servers. Using our Dynamic Ads.txt will remove the monthly task of you having to update manually.
When should your Ads.txt file be updated?
Your ads.txt lines should be updated on your root domain (https://yoursite.com/ads.txt) a minimum of 2 days before your expected launch date. Freestar's Google ads.txt line needs to be in place before you can test our code on your test environment or page. For best results, we recommend that you update to use our dynamic ads.txt with all of Freestar's lines during testing as we already added your current provider's lines.
How to find your dynamic ads.txt redirect URL
- Login to the Freestar Dashboard.
- Select the 3 lines icon in the top left to open the left menu.

- Select Site Configuration in the left menu.

- Next to the site that you would like to edit select the "View Fs Ads.txt" button in the main section of the page.

- Copy the URL in your address bar.

- Follow the steps below in "How to set up Dynamic Ads.txt" to redirect your ads.txt from https://yoursite.com/ads.txt to the redirect URL you copied.


How to set up Dynamic Ads.txt
Find instructions in the Freestar Dashboard
- Login to the Freestar Dashboard.
- Select the 3 lines icon in the top left to open the left menu.
- Select Site Configuration in the left menu.
- At the bottom of the page, you will find instructions for the different methods for creating a redirect. Select the tab that is appropriate for your setup.


If you are unable to log in you can find the instructions on how to implement this here.
How to edit your custom Ads.txt lines when using Dynamic Ads.txt
For the lines that are specific to your site and outside Freestar's portfolio, you can either edit this in the Freestar Dashboard or ask your Onboarding Specialist or Customer Service Manager to add them to your custom file.
To update in the Freestar Dashboard
Watch a demo of how this is done here.
- Login to the Freestar Dashboard.
- Select the 3 lines icon in the top left to open the left menu.
- Select Site Configuration in the left menu.
- Next to the site that you would like to edit select the "Edit Fs Ads.txt" button in the main section of the page.

- Add a new line to the top or bottom of your file.
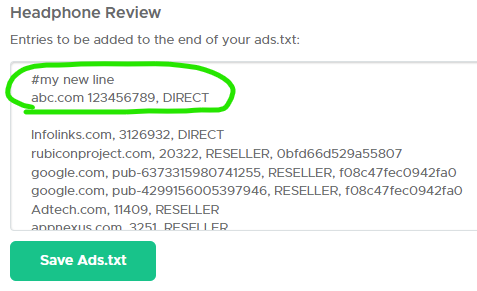
- Use # at the beginning of any comment lines.
- Note: It is very important that you do not delete any of your existing lines without checking with your Freestar representative as some lines are very important and may cause ads to stop serving if removed.
- Select Save Ads.txt.


